Special Report: 3-D equipment lends new capabilities to scanning, inspection process
Users of 3-D inspection equipment for molded parts demand simplicity, accuracy and speed, and suppliers are delivering.
Laser Design Inc.
Laser Design Inc., Minneapolis, recently introduced the CyberGage360 metrology-grade 3-D scanning and inspection system, which can generate precise, 360-degree scans of complex parts in less than 3 minutes. The system incorporates proprietary 3-D Multi-Reflection Suppression technology from parent company CyberOptics Corp., Minneapolis, to enable speed, accuracy and simplicity, said President and CEO C. Martin Schuster. "The CyberGage360 is also the only fixtureless measuring system available — no need to turn over the part," he said.
CyberGage360 combines the speed of 3-D, noncontact, projection scanning with the ease of use of an ordinary microwave. "3-D scanning of complex parts now simply involves opening a door, putting your part in and pressing a button," Schuster said.
"Anyone can use it with little training, which allows this technology to be located anywhere: office, factory floor, warehouse for incoming parts acceptance testing, or R&D for quick check of prototypes or 3-D printed parts," Schuster said. "Anyone can check parts for any deviation from CAD, or check critical features."
A key benefit of the CyberGage360 is its ability to speed up quality-assurance inspection of incoming parts and in-process components on the manufacturing floor. That can lower costs, Schuster said. Inspection reporting is built in and powered by PolyWorks software.
Laser Design supplies a variety of 3-D scanners, laser scanners, software and scanning services. Its products can be used for inspection of external dimensions and internal geometry of plastic parts and perform porosity and stress-fracture analyses.
Creaform Inc.
Quebec-based Creaform Inc. specializes in portable 3-D measurement products and services. Its portfolio includes The HandyScan 3D laser
scanner, HandyProbe Next coordinate measuring machine (CMM) and MetraScan 3D CMM scanner, all of which are specifically designed to work on the shop floor. The key benefits of the equipment include their dynamic referencing for shop-floor accuracy, simple setup and ease of use, said Creaform senior product manager Daniel Brown.
"The portable CMM and portable 3-D scanners use optical reflectors placed on the part directly to track it dynamically during measurements. This means that the measurement device and the part can move during measurement," Brown said. Similarly, with their dynamic referencing capabilities, Creaform systems remain accurate despite environment changes and varying quality of setup.
With its seven lasers and large scanning area, Brown said Creaform's HandyScan 3D scanner is the fastest 3-D laser scanner on the market. The HandyProbe Next and MetraScan 3D provide metrology-grade measurements of all materials. "Designed for shop-floor measurements, the system is free of any rigid setup and provides a large measurement volume that can be easily extended," Brown said.
HandyProbe Next, introduced in April, is ideal for validating the dimensional conformity of plastic parts and features an ergonomic design. It provides greater accuracy than the original HandyProbe product.
The latest version of the MetraScan 3D, also introduced in April, features volumetric accuracy to within 0.0025 inch and is suited for measuring black, multicolored and shiny surfaces. The most advanced model can take 480,000 measurements per second.
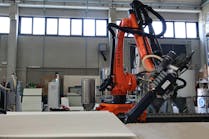
In addition to 3-D scanners and CMMs, Creaform supplies robot-mounted optical scanners, software, and reverse-engineering and scanning services.
Vision Engineering
Vision Engineering Inc., New Milford, Conn., makes ergonomic stereo microscopes and noncontact measuring systems. The company's Lynx EVO stereo microscope has a viewer instead of an eyepiece and is designed for use in a variety of applications, including laboratories, clean rooms and manufacturing inspection.
"The patented eyepiece-less technology is ergonomic," said Nili Walp, marketing manager, North America. "Operators can inspect plastic parts for long periods without the neck strain and fatigue associated with conventional microscopes, improving productivity and quality. The real brilliance of the patented design is the simplicity of operation." The imaging and ergonomics promote simple hand-eye coordination, critical for precision inspection tasks, Walp said. Operators can maintain high levels of performance throughout an entire shift.
The Lynx EVO has a standard magnification range of 6x to 60x, which can be multiplied using special lenses to provide a total magnification of 240x. Accessories include high-definition image capturing and a 360-degree rotating viewer.
Werth Inc.
Werth Inc., Old Saybrook, Conn., recently upgraded its CMMs and their software.
The company's ScopeCheck CMMs now feature a dual-ram approach and a multisensor interface. Therefore, an optical sensor and touch probe can both operate on the same axis, collecting a fuller range of data. This technology allows the sensors to reach all locations, even on a large workpiece, something that can be difficult for machines that use independent sensor axes.
Werth's multisensor approach also improves accuracy, said Detlef Ferger, sales manager for Werth's parent company, Werth Messtechnik GmbH, Giessen, Germany. "Measurements with multiple sensors can now be performed even on the shop floor due to temperature compensation. Two independent sensor axes prevent sensors that are not involved in the measurement from colliding with the workpiece."
The CMMs were recently upgraded with the latest version of the company's software, WinWerth 8.40, which features X-ray tomography functions. The new software also is used in the company's TomoScope X-ray computed tomography (CT) scanners. The upgraded software has a new feature, Multi-Spectra-CT, to analyze parts that combine plastic and metal. Now the machines can take two CT measurements with spectra tuned to each separate material, and then combine the measurements.
"With X-ray tomography, the workpiece is measured completely and precisely at the push of a button," Ferger said.
3D Systems Corp.
In September, 3D Systems Corp., Rock Hill, S.C., launched Geomagic Control X, its newest software for 3-D parts inspection and measuring. The software is compatible with all standard noncontact and optical scanners, as well as a wide range of portable probing and tactile measuring devices.
Featuring an updated user interface for easy, intuitive operation, Geomagic Control X provides fast, precise reporting and analysis, which leads to greater productivity, the company said. The software imports all major CAD file formats, including SolidWorks, Pro/Engineer, Creo and Solid Edge.
Lisa Jo Lupo, correspondent
llupo@plasticsmachinerymagazine.com
Contact:
3D Systems Corp., 803-326-3930, www.3dsystems.com
Creaform USA Inc., 888-979-5220, www.creaform3d.com
Laser Design Inc., 952-884-9648, www.laserdesign.com
Vision Engineering Inc., 860-355-3776, www.visioneng.us
Werth Inc., 860-399-2445, www.werthinc.com


